Thursday, 19 September 2013

Okay, Let's Finish This Up!- Everything Else

To be honest I've been working in the studio for a little over a week now. It was over a month behind, but in hindsight I think that's not bad considering the natural disaster we went through (I guess "natural" is debatable these days...).

Next post the finished studio. This time I will touch on everything else that was left because the anticipation of writing this and completing the project is over. Quite frankly, now it just cuts into painting time.

The ceiling was part of the "non-mastery" debacle. See earlier posts for reference. Eventually the contractor came in and finished it. It's a spantex knockdown finish.


We installed hardwood flooring. I found it on Kijiji. It's Bamboo. I found about 440 square feet that someone was getting rid of. It was over budget but probably a quarter of what I would've paid full price. I thought I would have to use something else to finish off the model stand but I managed to get the floor, the seat for the window and the model stand, with some left over. I squeezed the guy to make sure there was no waste, I'm also not very good at math. This time it worked out in my favour. The squeezing a guy thing always works out in my favour ;)


The baseboards and casing were installed twice. The contractor screwed up and put in small baseboards. No biggie, they redid it. The case (same guy as ceiling-see debacle). Uhg.

I had banks of fluorescents put in. I did this because you can mimick north daylight with an even spectrum these days. So thats what I got. I like them.

I had redone a fireplace at the old house and had some tile left over. It's nice stuff so I used it for this one. I like the design a lot.

I think that's about it. The eaves needed to be rerouted because of the window. I finished all the furniture, and my easel myself.


Thursday, 12 September 2013

Subfloor, Drywall and Fireplace

After the crew spray-foamed, the subfloor was installed. Nothing crazy here just your standard 3/4 inch plywood.

The original plan was to keep an existing fireplace that was in the garage. I think it was a furnace for the house but had been moved outside. The previous owners to us never used it and it wasn't hooked up. After much thinking we decided that after cleaning, servicing and connecting it, the furnace may not even work. When we opened it there were several mice nests in there.


So for the same price we decided to install a fireplace. There is already a gas line and then we didn't need to do any venting in the floor. From here we ran into a major delay because we couldn't get a gas inspector. This was because of the flood. I would have to agree that peoples homes were more of a priority than my studio.

Once that was all framed in and inspected we moved on to drywall. This step really gives you a sense of what the space will look like. The taped and mudded. Some weird angles in this space so it was a mudding challenge.


Monday, 2 September 2013

Building a Studio: Addendum-Not approaching Mastery

I have a huge amount of respect for someone that is a master in their chosen field. I don't really care what that field is. For example: I was travelling and helping a friend move out to Vancouver many years ago. He took me to a nice restaurant by the sea. It was late and the place was closing. I think we sat and watched this elderly Japanese man who was our waiter for a good half an hour as he folded linens. He was a master. He took pride in the task he was doing and you could tell. It was beautiful to watch.

...so this brings me to the guys who did my ceiling, baseboards and trim. They are never going to be masters. It's a simple observation. Rushing through everything, hoping I would say that's good enough. Having to do it over again. Using cheap equiptment, complaining openly that they weren't making any money on this job. (aside-if you had taken pride in your work and done it properly the first time around, you would have made money).

If a person tries and fails, then learns from that and eventually succeeds, cool. That's the best way to learn and eventually master something. If they half ass their way through life, not cool.

I won't openly slam them online, but if you are in the area and need this kind of work done contact me please so I can tell you who they are and not to use them.

These guys were masters.

Tuesday, 20 August 2013

Building a Studio: Installing The Window and Door and Insulation

When my wife first saw this house she thought it was, "The One". It has everything we want and need. It's in the same community we were in before, but really close to the school our children attend. It has tons of space. As it matters to art: It has a workshop in the basement and a detached garage. The door opens into the garden, which faces north. Right away we could picture how it would look when finished.


A temporary wall was built to support the weight of the roof before we cut the hole for the new door and window.

The window.

Inside looking out

Both the window and door.

It's pretty cold here in Canada. We have winter for eight or more months a year. So to turn a garage into a studio we felt that it really needed to be insulated properly. After building the floor up to get it off the concrete we then spray foamed it. We also did this to the ceiling. It was expensive, but we just felt that that's where the majority of heat loss occurs. We used bat insulation on the walls.


Apparently this stuff is deadly in liquid form (hence the hazmat suits) but within ten seconds I'm told you can it eat. I didn't believe them so I made my kids eat a bunch. Turns out they were right...

Thursday, 8 August 2013

Building a Studio: Framing

A side note: Since my last post Calgary and a lot of Southern Alberta has gone through major flooding. It's like there are two different Calgarys'. Personally our property was not affected. In the studio, the contractors hadn't gotten the siding up yet so there was a bit of water damage to the drywall from the rain. No flooding occurred. My family and myself spent a great deal of time trying to help out the victims where we could...

Now back to work!

We had to make a modification in the engineering. The solution they came up with is to have to cables running width wise across to provide extra protection from the roofing buckling and falling down. Personally, I feel this is just a step by the city to make a bit of extra cash and a legal failsafe (over-engineering). It was built so strongly that there is no way it would ever cave in. The cables were put in before the trusses were taken down.

Really expensive anchor the engineer came up with that was originally engineered incorrectly...

Next it's time to cut the hole for the bay window.

Uninstall the garage door and frame it.

This is the hole for the french Door.

The floor is built up with pressure treated 2 x 4. It's reinforced, glued, and screwed down.

The ceiling without trusses.

Next the window was built. This itself was a big job. I have confidence that if a tornado picked up the studio and threw it across town, this window would still be intact! It's attached to both the ceiling beams and the structure underneath. 


Monday, 10 June 2013

Building a Studio: The Roof

My main vision for this space was to open it up. I love the shape of the roof, so I am not interested in changing that. It's also not really in the budget. I thought long and hard about putting in a skylight, but decided against it. I am opening up almost the entire north wall with a bay window and french doors. There will be a ton of natural light in there.


 The existing shingles. Cedar, circa 1963. I've never seen a drop of water in the space.


Although the roof didn't leak it just made sense to redo the exterior while we did everything else. Also, we are spray insulating the inside ceiling. So you don't want to pound nails through that stuff.


Opening up the space means getting rid of the joists. For some reason they are spaced every twelve inches. I think it's more common to have them every sixteen or even twenty four? The rafters need to be reinforced to accomplish this. They added 2x6's to the existing 2x4's that were there. These were glued and screwed in.


Beefing up the existing rafters.

Once we get the okay from the engineer we will use a couple cross braces to add some support. 

Next we removed the old roof

Sunday, 2 June 2013

Building A Studio: Preparing the Perimeter and Demolition

When we left, our hero, had just given the contractors money and hoped they would return when they said they would. Well they did! Almost. They were a week late. A month prior to that they sent me drawings and then we had a meeting to go over them. So I was pretty sure they would start the job. I was just trying to build suspense for the sake of really, really, good writing...

Surrounding the studio is a 2x4 base. It had to be removed and also any material so there could be about four inches of exposure so it could be water-proofed. This will be done with a special glue and concrete compound.


          Next the overhead garage door had to come out. Then it had to be framed and reinforced.


This step is to seal it off from the alley. This will accomplish many thing. It'll get rid of any dust that comes in from the alley. It will sound proof it. The space will look more like a liveable space and also will make it warmer. I have left over cedar plank siding that is a match to both the existing studio space and the house. I will paint it when it's on.

Wednesday, 15 May 2013

Building a Studio

When we had children, we made the decision for me to stay home and raise them full time. I was in a few galleries and things were moving along.  I also saw the hiatus as an opportunity to change paths artistically and take care of some gallery situations (that's another story)...

Changing paths was more getting back to my roots of representational drawing and painting.

About a year and a half ago we decided to move. A bigger house and a place for a studio. These next series of blogs will follow the progress (hopefully) of the studio build.

I think it was October of 2012 that I finally secured a contractor. I'm fairly handy and I knew exactly what I wanted. There were, however, a couple things that were over my head and I wanted them to meet code. I met with several companies and I went with the people I am using because I felt comfortable and they said they could do what I wanted. They asked how long I planned to live in the house. I guess it's because although I wanted to do a really nice job, taking a garage out of the package of the house would decrease it's value. I said I plan to die here; not today or tomorrow, but I'm never moving again. It's a really nice house and we are really happy. My children can deal with that problem.

I gave them some money and they went away.

My space is a "super" single, detached garage. It's close to 400 square feet. I would've wanted more, but I have a workshop space in the basement that I can can use for storage, framing, and whatever else I need. It is also doubling as my studio right now.

So the space will be used just for painting, drawing and teaching.

In April I got the drawings. The start date was scheduled for May 1st. They have started, albeit a little late and are well under way. I gave them some more money.

 I will blog it's progress and go into detail what is being done and why.

Here's the where it's being done:

That doors opens facing north.

We will remove this overhead door and seal it.

North side. French doors and a big bay window.

It will be a very nice view into the garden.


Saturday, 6 April 2013

The Portrait

Many years back I was sitting in the office of my Sensei (I teach and practice a martial art called Aikido). I had asked for a meeting and I told him I needed to stop training. Times were tough and I wasn't selling a lot of artwork. I loved Aikido but it just wasn't financially viable at the time.

He knew how dedicated a student I was, but he understood my predicament. He proposed a commissioned portrait for a years worth of mat fees. I had mixed emotions. I wanted to keep training, but portraits intimidated me. I offered to do a big landscape instead. He wanted a portrait. I reluctantly agreed.

I had been drawing portraits since I was five I think. I had The Beatles, White Album. It had these nice big 8x10's of the band. I used to draw them and my mom would critique them. I would draw comic characters and pretty much anything that interested me. In high school I even had some cartoons published in the local newspaper. With a pencil in my hand I was confident, but paint was another story.

I started painting while I was an amateur athlete. I was a long track speed skater. I also attended the local art college. I was part of the painting faculty. There were almost no fundamentals taught when I was there. I hope that's changed. What I did learn was that I was completely on my own to learn, so that's what I did. When my body said it was time to move on from skating, I got gallery representation and never looked back. I did mostly landscapes. I got into a pattern where I would design and idealize to suit my needs. When the time came to represent something faithfully I had a lot of trouble.

I'm not sure exactly, but Sensei's portrait may have been the catalyst for the "big change", much like the big bang except there was matter beforehand and no real sound...

I did the portrait and it was awful! Really, really bad. I had no clue what I was doing. Here I was, supposed to be a professional artist and I was stumped.

 He hated the portrait and so did I. He wanted me to redo it, so did I. Sensei was very compassionate, he never pressured me to finish it.

Then he had a stroke and five months later he died.


Classroom scene. Sensei like it but he wanted to see his face.


Although I tried, I never held up my end of the bargain.

Around this time I found Richard Schmid and Jeremy Lipking. I just stumbled onto their work. Living artists that could could paint beautiful realistic paintings! Through them and their paintings I also rediscovered John Singer Sargent, Zorn and Sorolla. I started to really study all their work and I got Richard's Book, Alla Prima: Everything I know About Painting. It just made total sense. I followed it to the letter. I also got Jeremy's book and DVD. Later I went to visit Jeremy and take a workshop.

It was an exciting time. By exciting I mean dreadfully scary and frustrating. In Richard's book he states you should never leave anything on your canvas that you know is wrong. So that became my personal credo. My ultimate goal was to be able to sit down in front of anything and represent it faithfully.

On top of all this I became a father and a stay-at-home dad. I decided I wanted to reinvent myself as an artist and change everything. With my limited time I went into the studio and began practicing. I wanted to finish the portrait I started. I thought that we should have a visual memory of Sensei in the dojo while we practiced. So I collected all of the reference material I had of Inaba Sensei and I began.

I must have done that portrait sixty or seventy times. I finally got to the point where I was satisfied.

We now hang the portrait up when we practice. It's a nice little memory of Sensei to the students who knew him. It also gives the new students a visual of the man that brought Aikido to Calgary.

To me it's so much more than a painting. It's a reminder of struggle, perseverance, failure, loss, gain, success and also how much farther I have to go. I see things that I could of done better, although it was my best effort at the time...


Inaba Sensei

Tuesday, 25 December 2012

Painting Over A Stinker: Or, Third Time's A Charm


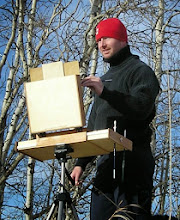
In this post I will take you through a Plein Air session. I am going to use a method of painting over a stinker (failed painting)...


You have them. So do I. Everyone that paints does too. Not everything we do comes out the way we intended. The best you can do is try, play, fail, learn and keep going. I don't get as frustrated as I used to. (if you do get insanely frustrated I recommend a good panel-they skip across the lake nicely).

This particular demo is on a panel I made from mahogany door skin that I made. It's sized and at least triple lead primed. The stinker on there is a still life that never went anywhere.


If your stinker is fairly wet you can just rub it off. This one was dry. I chose to sand it down a bit, just to get rid of the ridges. I use the stinker sometimes to show through in places if there is an opportunity.


Next I clean it off, wipe it down and it's ready to go!


It's a gorgeous day. No wind. There is an eerie calm we get sometimes with a chinook in this part of Alberta, Canada. I find a good spot and set up.


I know it's going to be a fairly cool painting so I make a decision to have a warm underpainting. I put on a burnt sienna/turpentine wash. I use turpentine so it'll set up faster. I also prefer the feeling of painting over this initial wash. I want to be able to have both the warm and the old painting coming through in spots. I generally do this right away, before I have set out my palette.


Next, I eat. I have been out for awhile hiking and scouting. I like to think I am ready for anything. I get into some precarious spots sometimes so if I get stuck without food, water or warmth, bad on me. On my breaks I scout out other close by areas. One time, I fell through the ice up to my shoulders. Stupidly, I painted for another hour after that. In my defence, I had already started painting and had a good one going. I slept well that night...


Anyway, getting back- This also allows time for the wash to set up. I make sure I've set out the palette, get everything ready to go so I can just focus, and I start.


I figure out what I want to get in the scene. Sit there and observe. Next I get my darkest dark, the big shapes and most of the composition sorted out.


Now I work on the focal point of the painting. I work back and forth sort of like doing a puzzle. Mostly working out the areas adjacent to each other; comparing their colour, values and edges. Not really finishing as I go but close enough to move on.


The focal point is now blocked in and for the most part what I want.


I add most of the mid ground colour, leaving warm bits throughout to create a harmony. This stage is fairly loose because most of the snow in the shade is is similar in colour and value.


It's getting close to the end now. I get into the snow that is in the light.


Union rules stipulate it's time for coffee. I get up, stretch, walk around and not look at the painting for a little while. The light is fairly consistent so I'm not worried about losing it. When I come back I clean the palette, (which I have done frequently throughout). Now I'm ready to finish it up!


I put in the final highlights, some knife-work in the foreground. both of which I leave pretty thick. This is all I really came here for so I sign it, pack everything up and call it a day.